| 故障排查: |
Cause/Action
1. Turn ON the power and enter the Diag mode. Change the value of NVM [715-030] to "1" and then perform IIT Faulty Parts Diagnosis. After performing the IIT Faulty Parts Diagnosis, select [Change Settings].
2. A 3-digit or 4-digit number is displayed in the [Current Value] field.
3. Check the upper 1 or 2 digits, or the lower 2 digits and replace the appropriate parts. (For more information on display example and part selection, refer to Procedure 3 in 062-371 FIP.)
4. After replacing the appropriate parts, change the value of NVM [715-030] to "1" and then perform IIT Faulty Parts Diagnosis. After performing the IIT Faulty Parts Diagnosis, select [Change Settings].
5. Check that the display in the [Current Value] field becomes "0".
6. If the problem persists after performing the above procedure, check the following:
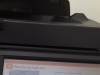
The connection between the CCD Lens Assy J701 and the IIT Trans PWB J710 for open circuit, short circuit, and poor contact.
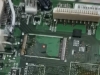
The Flat Cable between CCD Lens Assy J700 and Controller PWB J336 for open circuit, short circuit, and poor contact (especially check whether the Flat Cable was inserted in a skewed manner).
7. If no problem is found, replace the following parts in sequence. However, each time a parts is replaced, check whether the Fail is still occurring and return the part if it has no problems.
CCD Lens Assembly (PL 1.3, PL 1.9)
Controller PWB (PL 35.2) |